Blog
Welcome

Recent posts
There's no substitute for display samples that your customers can touch and feel, but you can give your clients a wider "trade show experience" in your marketing materials and website with our new stock image downloads.
They're free to use anywhere you're selling. Download our PSD layouts, add your own imagery to our layout shots, and you'll have a virtual product complete with your own photography! Maybe you can even help your clients envisage their purchase by using images from their own shoot. It's quick and easy in Photoshop, and we'll explain how.
To download our stock image files, click here. The files supplied are high res, so each download may take a while. Make sure you resize the file before saving, especially for web use, to ensure fast loading speeds.
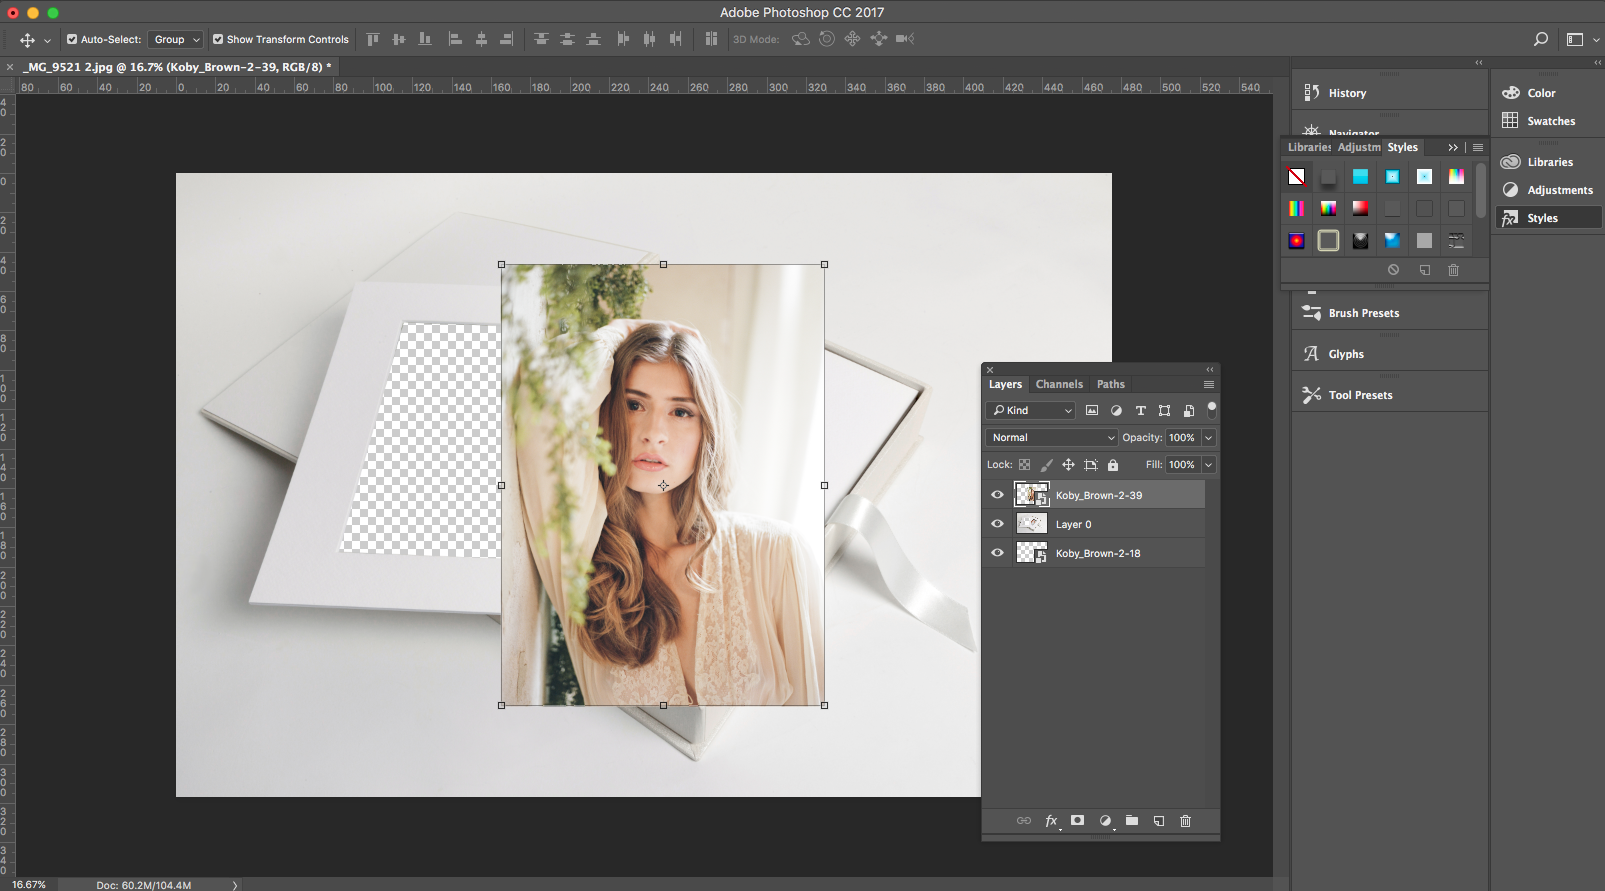

Drag image onto Queensberry Stock Image PSD file
loading...


Drag image onto Queensberry Stock Image PSD file
Once you have downloaded the product folders you want to use, it's time to super-impose your work into the PSD files.
Step One: Make a copy of the original file that you wish to edit, and and open it in Photoshop. You'll see that we've cut out the places that require images. It's up to you to choose the images you want to display.
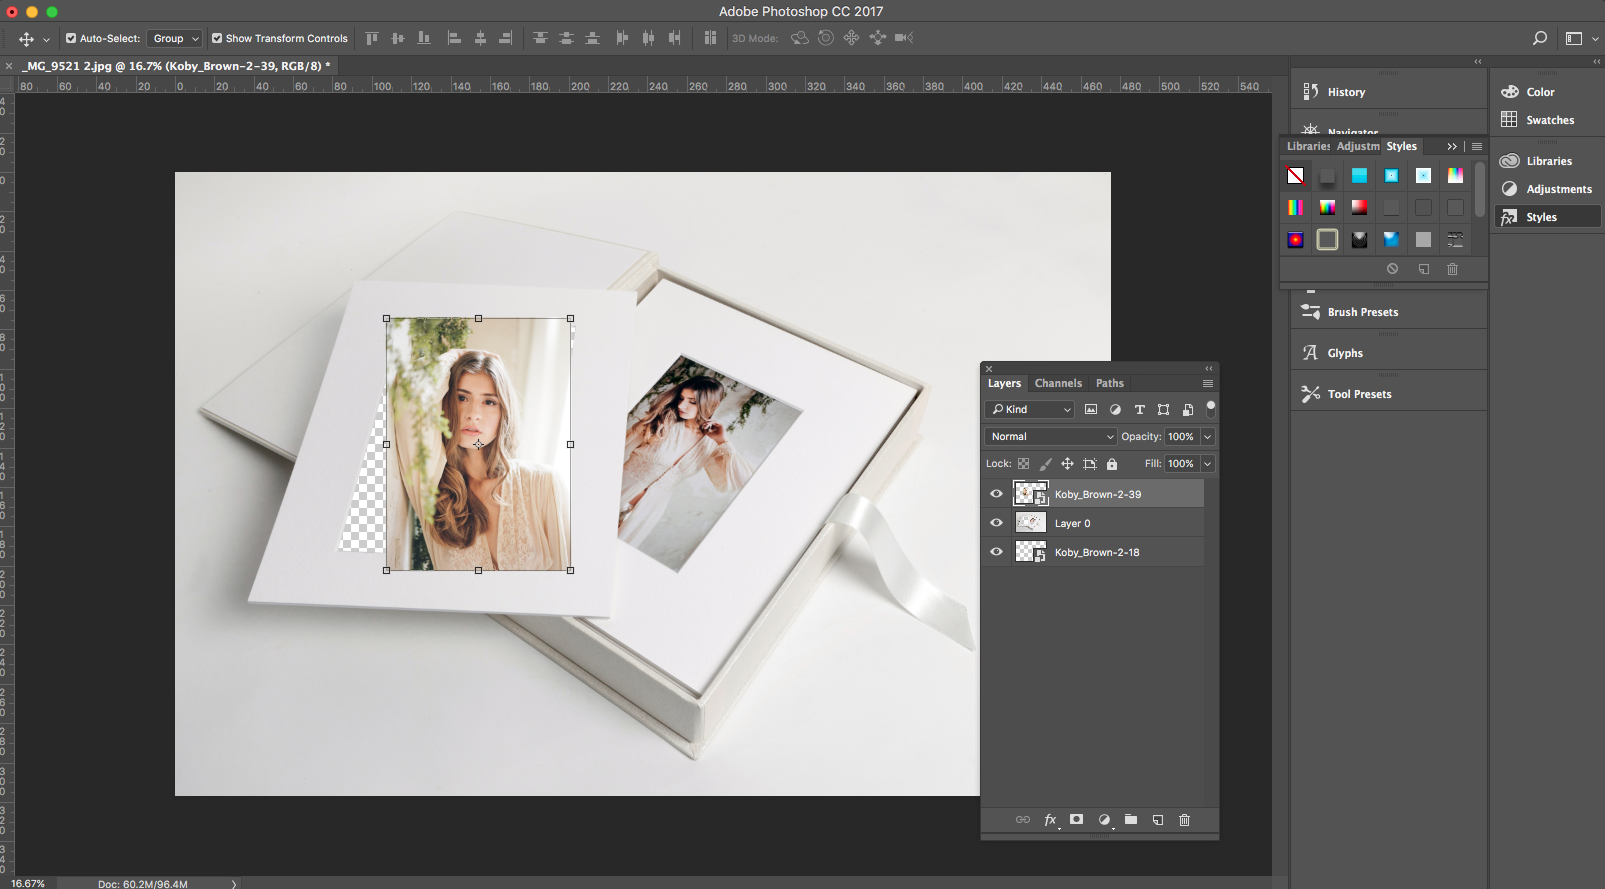

Resize the image, to be roughly the same size as the aperture.
loading...


Resize the image, to be roughly the same size as the aperture.
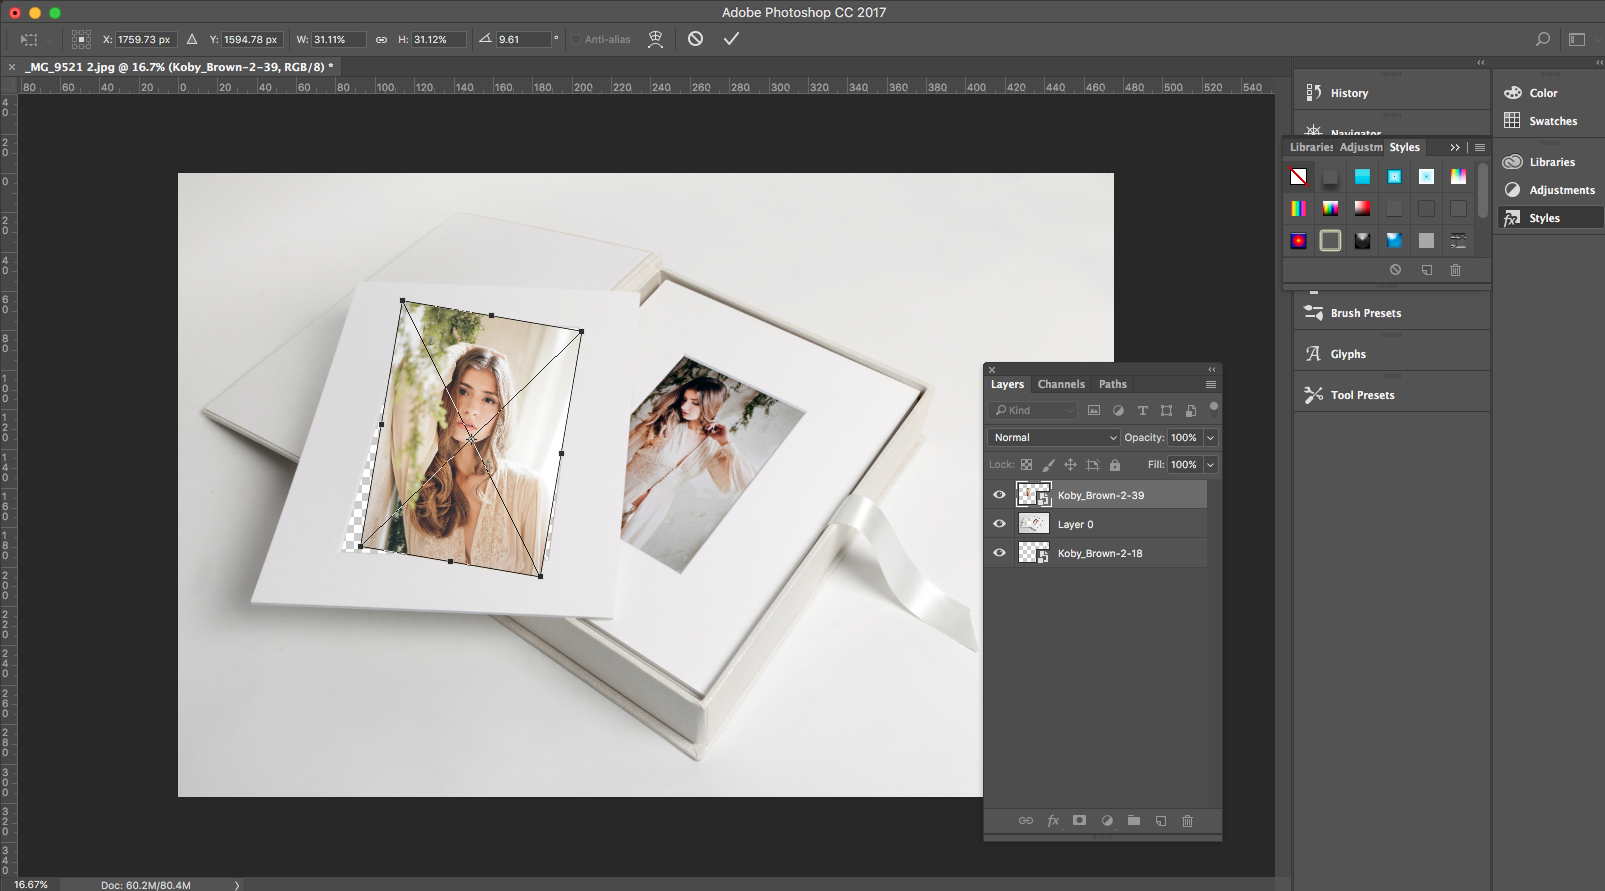

Tilt the image at the same angle as the aperture.
loading...


Tilt the image at the same angle as the aperture.
Step Two: Size your image to roughly the same size as the displayed aperture. Tilt the image if necessary as in the graphic above right. Then, in the layers panel, move your image behind the product image layer (below left).
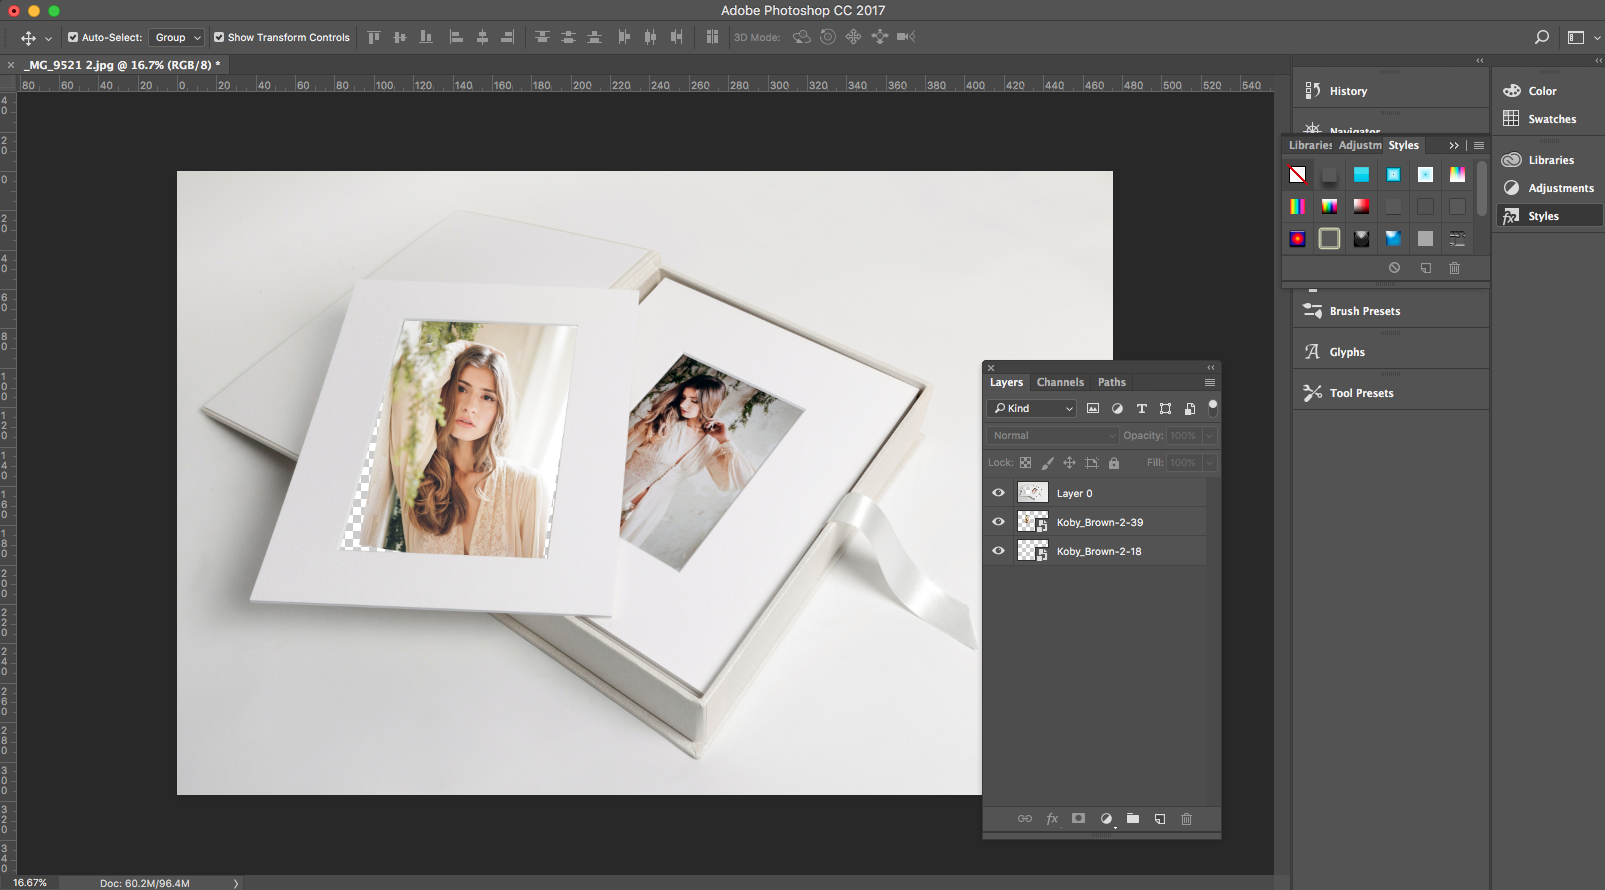

Move your image behind the product image layer
loading...


Move your image behind the product image layer
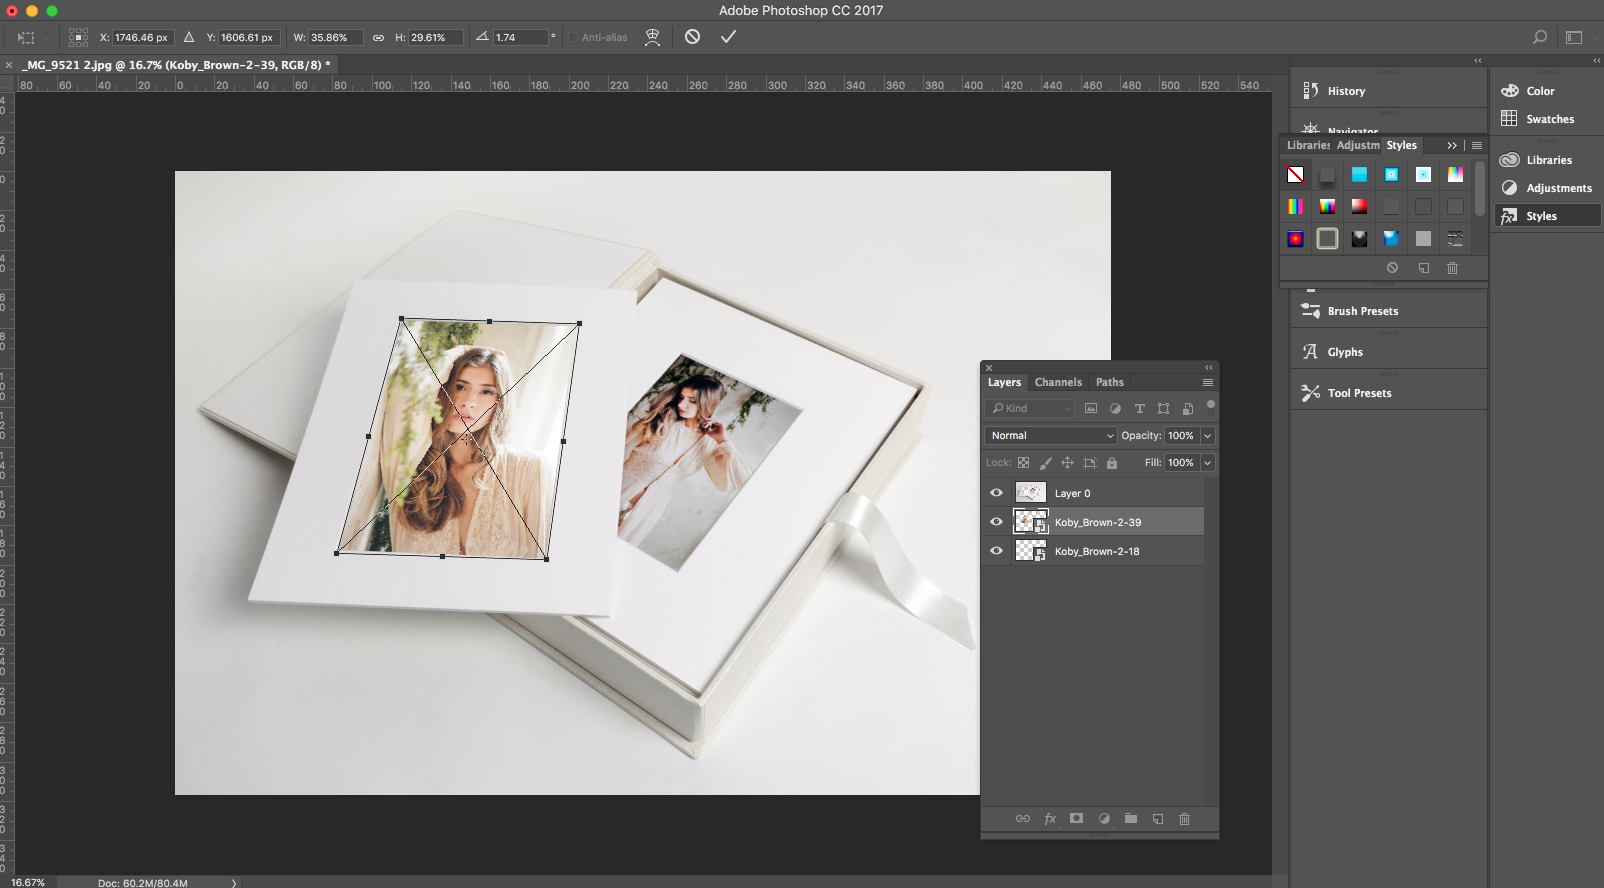

Distort the image
loading...


Distort the image
Step Three: In some cases you may need to distort the image slightly to fit the product image. This is easy! Double click your image in the layers panel, to make it the active layer, then type "Comand t" to edit the file (CTRL-T in Windows). Hold down Command/Control and click on the corners of the image. Pull the image corners to the corners of the aperture you want to fit it into. Save it as a copy.
You're now ready to add these images anywhere you're selling, whether that's online or in your marketing brochures. Just remember to flatten and downsize a copy of the file for online use!
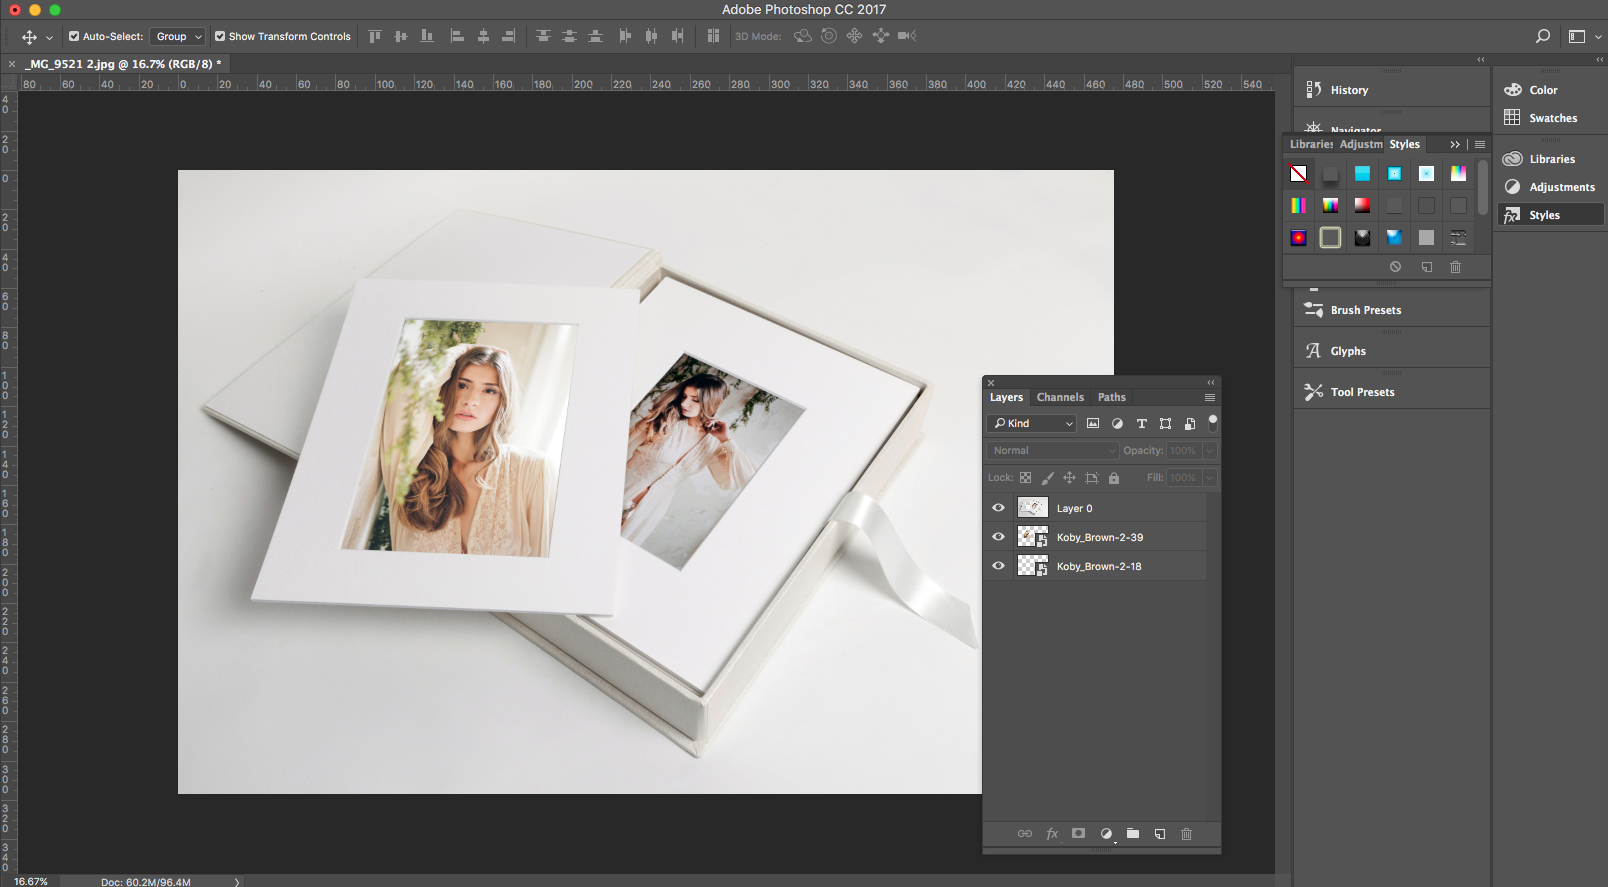

Resize, save and add to your website or marketing material
loading...


Resize, save and add to your website or marketing material
To download follow this link, you will need to be logged in to Workspace for access.
Alexandria x
Images feature by Koby Brown Photography.


Email: info@queensberry.com
Free Phone Numbers:
New Zealand: 0800 905 905
Australia: 1800 146 251
USA: +18668350851
UK: 0800 808 5271
Canada: +1 855 581 0370