Blog
Welcome

Recent posts
SEARCH RESULTS FOR: Photojunction

We know the feeling – you know there must be a way to do something, but you just can't figure it out. Here's an example: there's no standard "title" aperture in PJ Remix, so how do you add a title? There are actually two ways to do it. The easier way (but maybe also easier to get wrong) is simply this: Add a blank aperture to the layout using the Add button (left image, above) Change the aperture to Customise (right image, above) Uncheck the Constrain Proportions box and enter the values directly. Easy as long as you remember the values: 112 wide by 200 high , as above. Whether you use To View More >>

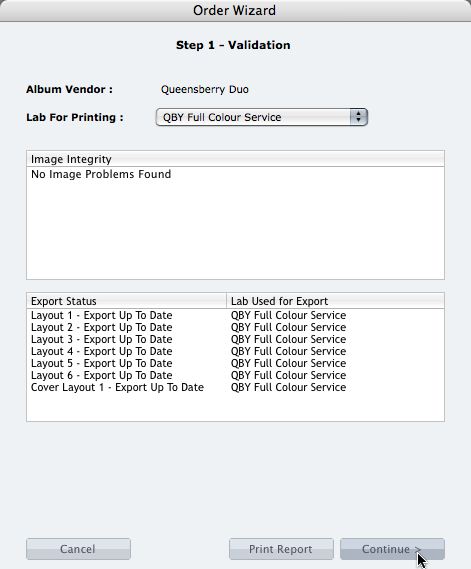
We're describing the perfect way to send us your print-and-bind order... After exporting your files you definitely shouldn't jump straight to LabFTP and send us the files - we wouldn't know what to do with them! Instead, always use the Remix Order Wizard. (You'll find it under the Album menu). Remix will validate your order and create an order "bundle" that contains everything we'll need to process your order - provided you follow these instructions: 1. Run your order through the Send Order Wizard. You'll find a tutorial here. The Wizard will ask what service you want (eg Print & Assemble) To View More >>

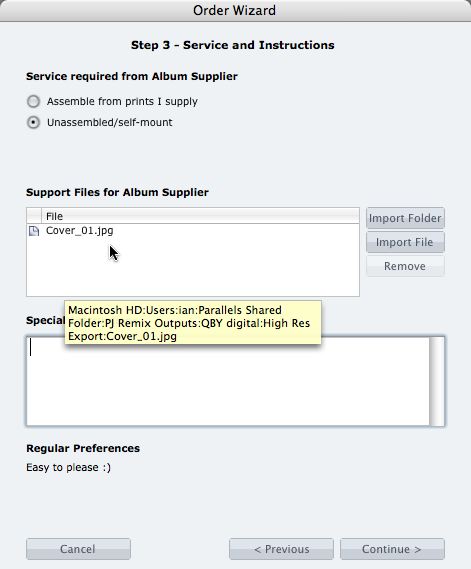
What if you want us to print your cover image, but nothing else? 1. When you fire up the Remix Order Wizard , choose either the "Assemble From Prints Supplied" or Don't Assemble" option. 2. On the same screen the Wizard will offer a place to include "support files" for your album supplier. Open your folder of High-Res Export files and drag in a copy of the cover image (don't double up by sending it to your lab to print as well). 3. Remix may ask you if you want us to print the cover image (generally it'll be obvious what you want, in which case Remix won't ask). Be sure to say Yes. 4. When the To View More >>

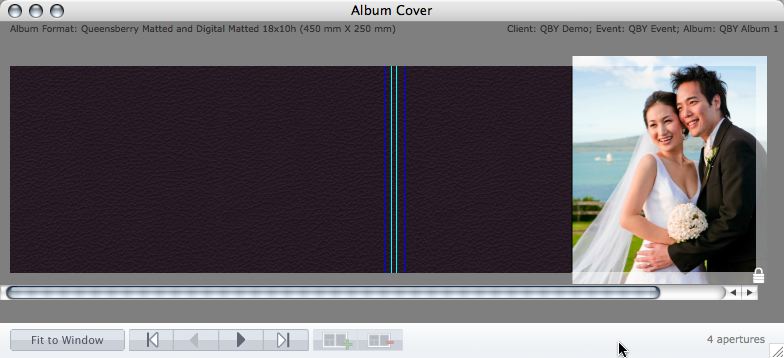
Cover layout design in PJ Remix Here are the first steps in preparing a perfect, hassle-free print-and-bind order, really fast. 1. First, upgrade to PJ Remix. If you have already, thank you. 2. Use Remix to design your cover as well as your page layouts. You'll get to frame and crop the cover image yourself, see exactly what it looks like and be sure that it looks good. For example, here you can see how much of the image in the photo front cover layout above has been cropped away. No problem in this case, but many images won't be suitable: 3. Export your cover AND page layouts using Remix's Export To View More >>

When your first ever album order catches Queensberry’s eye you’ve got to be pretty pleased with yourself. Especially when you designed it in a program you’ve never used before. Keryn Sweeney of Keryn Maree Photographer recently opened her studio in Auckland, New Zealand, and shot and designed this little gem as a studio sample for the beauty side of her business - an area she’s had plenty of experience in. Keryn recognises the benefits of offering her clients albums, but although she'd come from a well-established beauty and glamour studio she'd never used them before. When it came to To View More >>


Email: info@queensberry.com
Free Phone Numbers:
New Zealand: 0800 905 905
Australia: 1800 146 251
USA: +18668350851
UK: 0800 808 5271
Canada: +1 855 581 0370